In today's post, I am going to show you how to check RAM in Windows 10.
In fact:
These are the same strategies I used to optimize my RAM for improved performance.
Let's get started!
In today's post, I am going to show you how to check RAM in Windows 10.
In fact:
These are the same strategies I used to optimize my RAM for improved performance.
Let's get started!
Share this article:
Share this article:

Checking your Computer specification is not that tough. You just need to know from where you can check this. I am going to show you the steps in Windows 10.
So here are my 3 best ways to check your RAM specifications.
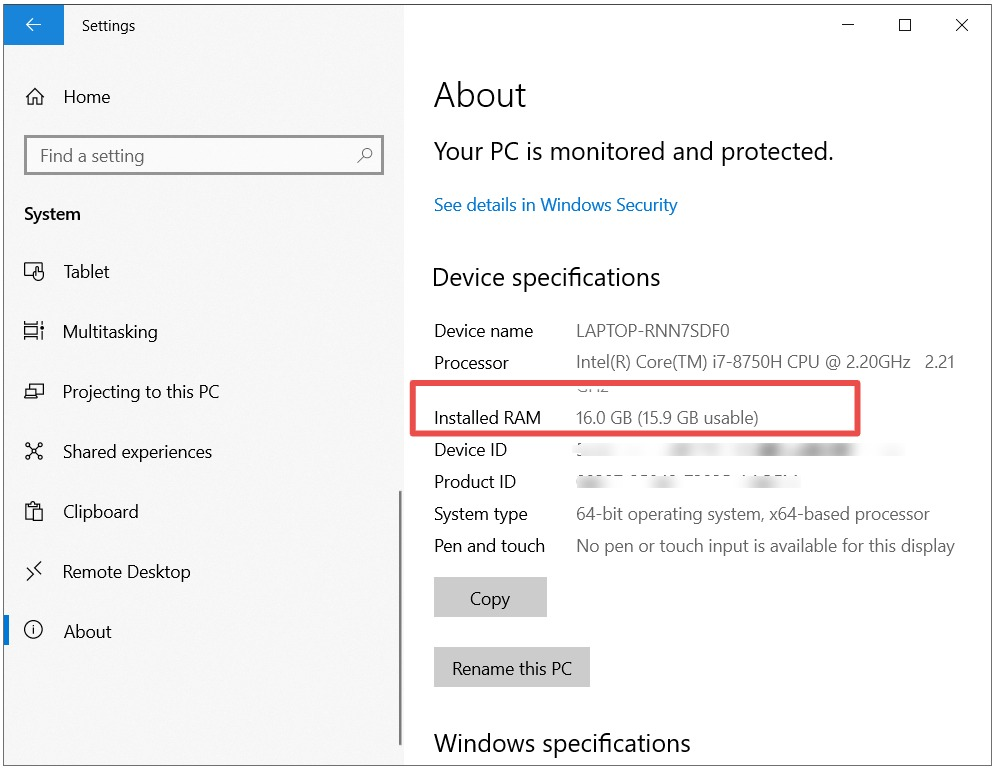
Great.
How do you check for more system information?
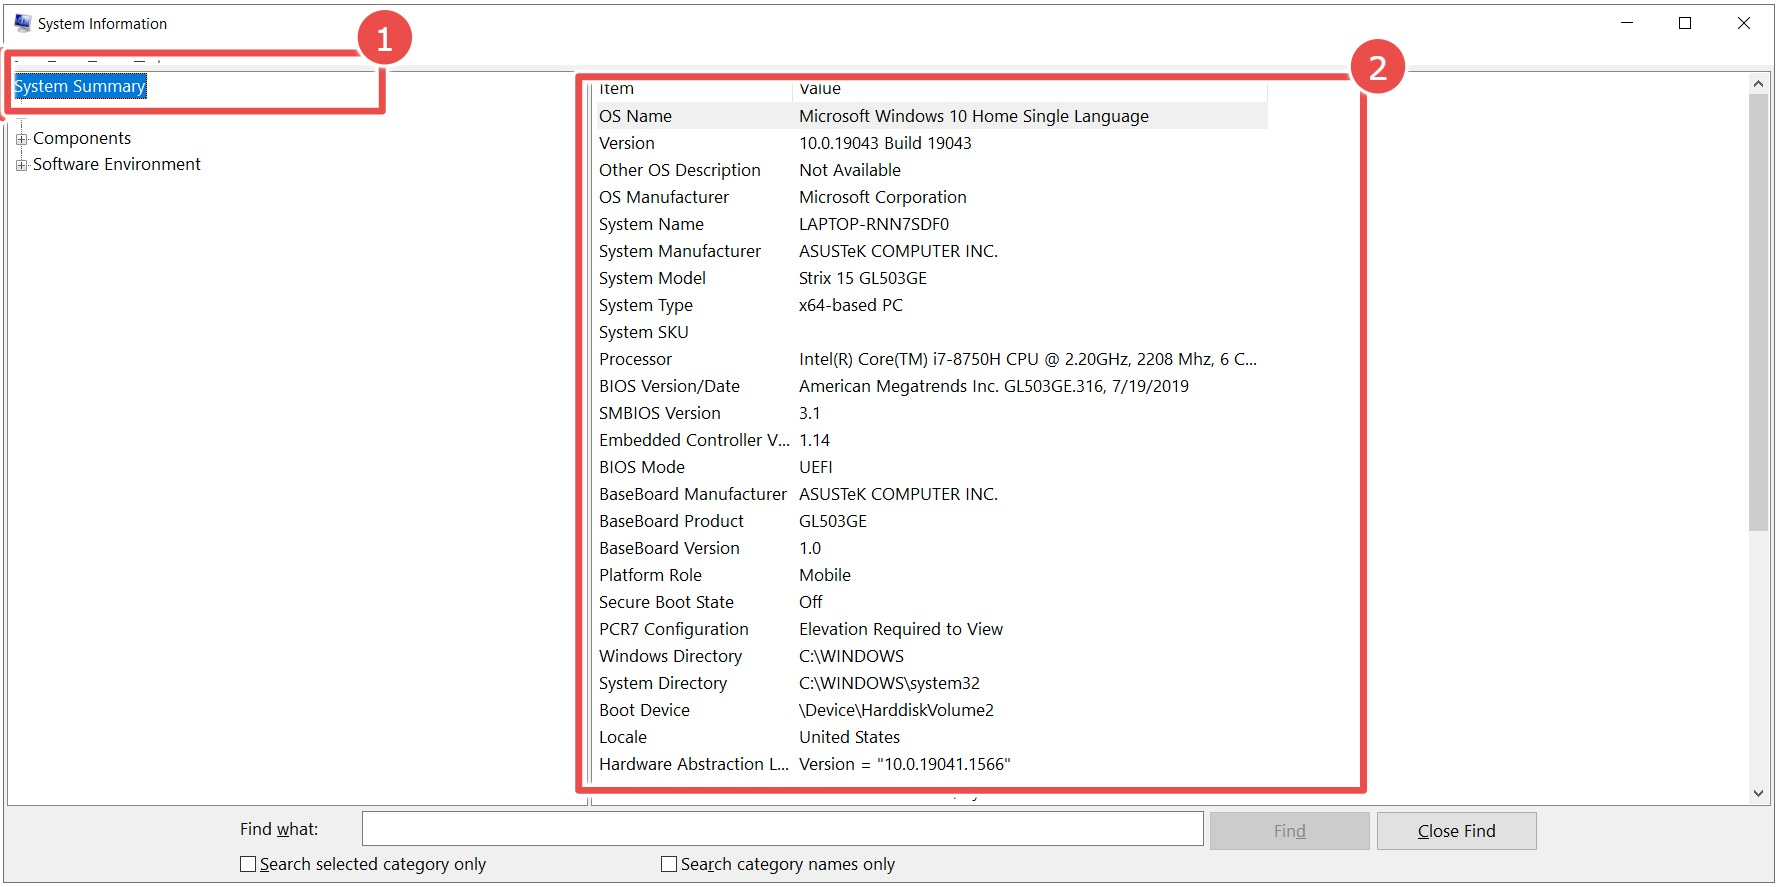 Specifically, there is a section that shows memory details.

Check the infographic to understand the different types of memory before I explain the above math.
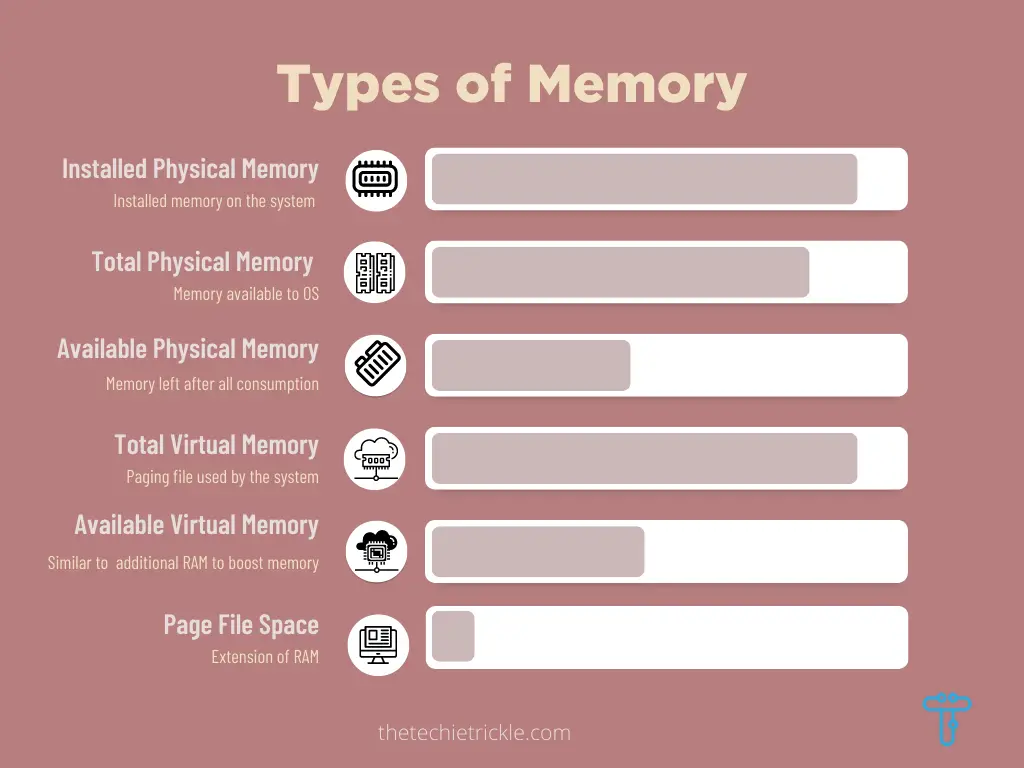
This is the physically installed memory on your system. In my case, I have installed 16 GB of RAM.
From this 16 GB installed, your operating system can only use a specific part. In this case, 15.9 GB is usage, the rest is not.
After all of the operating system functions and applications are loaded, you have the current amount of RAM available. This is the available physical memory. I have only 8.12 GB on this system.
Virtual memory is a process that your computer uses to help it run more smoothly- also known as a paging file. If you have too many programs open at once, or if one of those programs is particularly RAM-heavy, virtual memory will allow your computer to use a section of your hard drive as if it were extra RAM.
This helps your computer avoid overloading and crashing. Hard drives are much slower than RAM, so virtual memory can slow down your computer. If you find that your computer is frequently lagging or crashing, it might be helpful to increase the size of your virtual memory. In my system, this memory is 18.2 GB in total.
Virtual memory is a function of an operating system that uses hardware and software to make up for physical RAM shortages. When virtual memory is active, the operating system uses a portion of the hard drive as if it were additional RAM. This allows the system to run more programs simultaneously, or run a single program that requires more RAM than is physically available. In this case, available virtual memory is 8.38GB.
A pagefile is a portion of hard disk space that is set aside as an extension of random access memory (RAM) for data that hasn’t been accessed recently. Because a pagefile can be read from the hard disk as a single piece of data, it may be quicker than re-reading information from many distinct starting places.
Before upgrading your RAM, you need to check how many available slots there are. Many of the newer laptops come with only one or two slots.
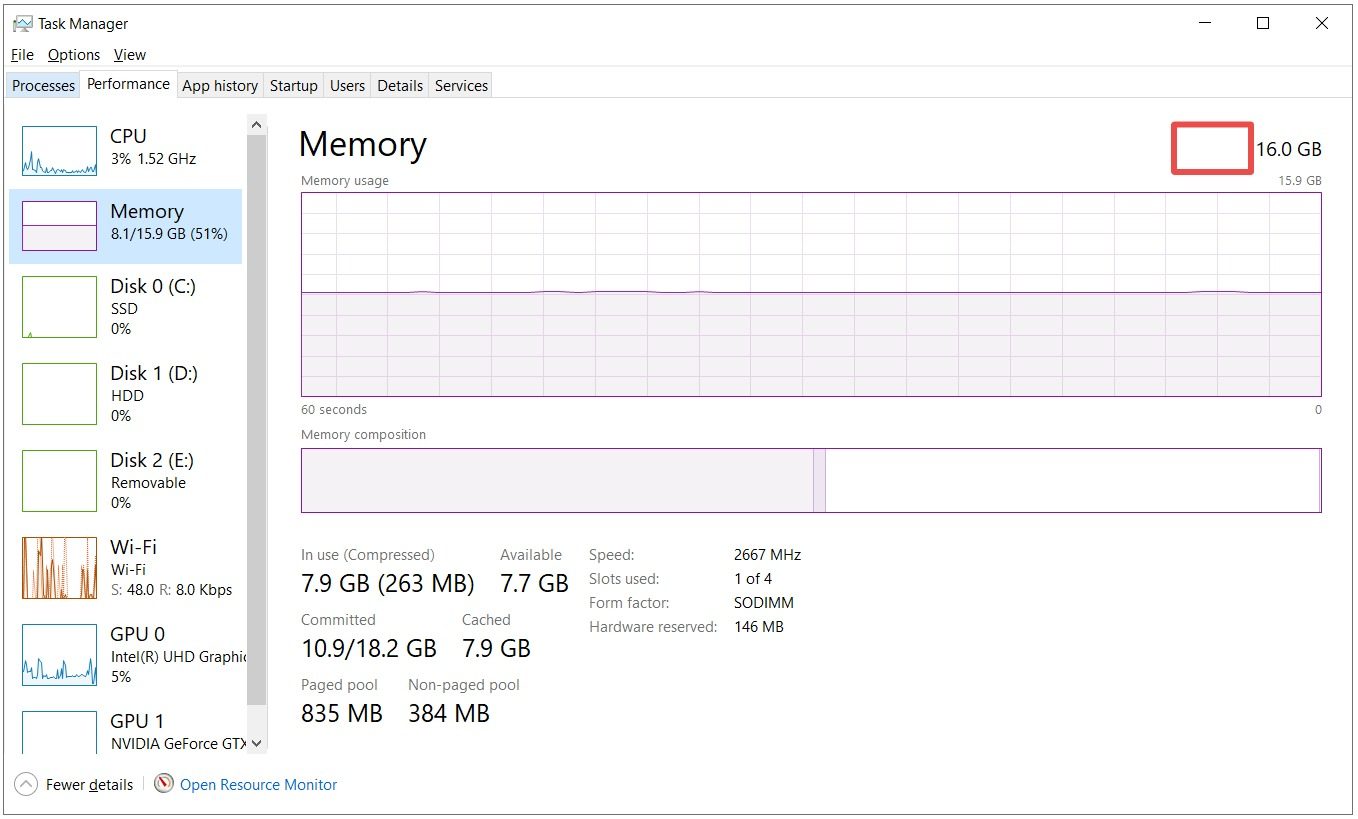
Open Task Manager and tap on Memory.

On the right side, it gives you how many slots are still available. In this test, 3 slots are still available.
Follow the below steps to check if your computer is having DDR3 or DDR4 RAM in the older version of Windows such as Windows 10:
In my case, you can’t see this because I got the laptop upgraded to Windows 11 and now it is not showing here.
Ok, so you can check this from the Command prompt too.
Type the command :
wmic memorychip get devicelocator, memorytype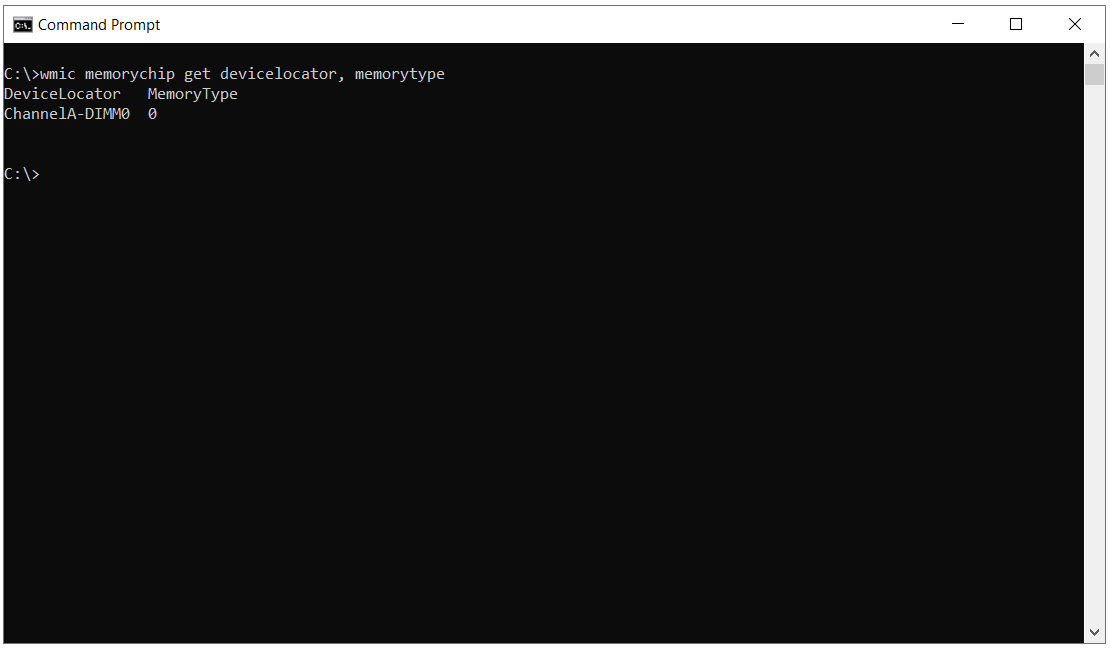
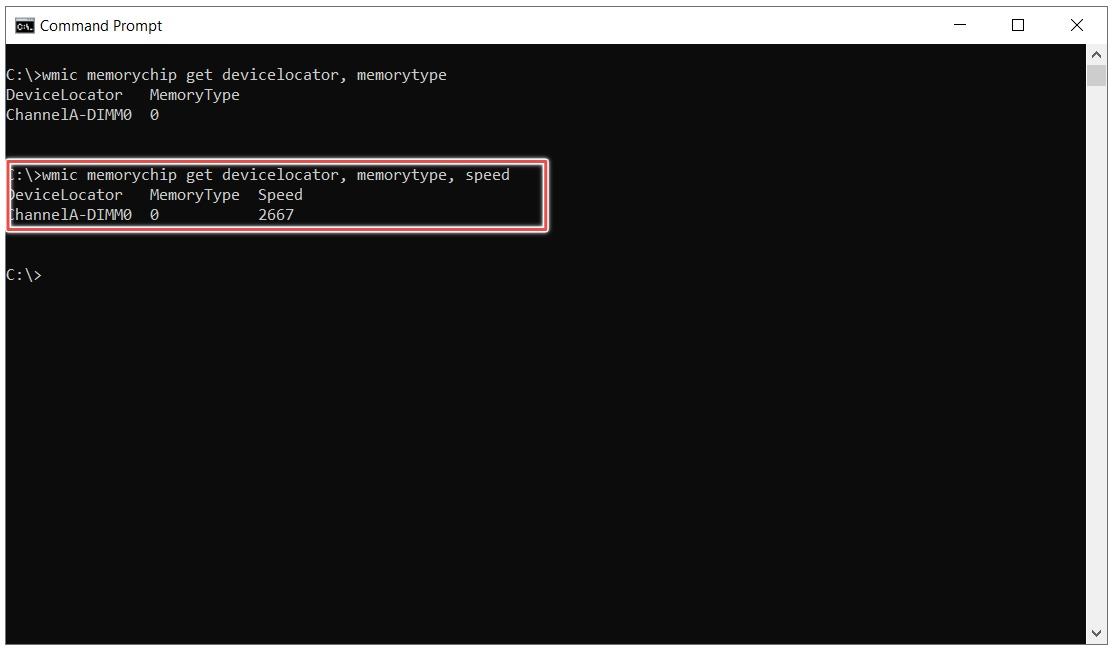
WMIC, a short form for Windows Management Instrumentation Commandline is a useful command to check the hardware information. In my case, MemoryType is displayed as zero, which could mean that the RAM type is DDR4.
Further, I am convinced because the Speed (clock speed) shows as 2667 which falls under the DDR4 category.
DDR3 clock rate is 400 MHz, 533⅓ MHz, 666⅔ MHz, 800 MHz, 933⅓ MHz, 1066⅔ MHz
DDR4 clock rate is 800- 1600 MHz, 2400 MHz, 3200 MHz, 4800 MHz, 5000 MHz
Determining the right DDR3 or DDR4 in Windows 10 is very important before you make the buying decision.
After you have checked the available slots, RAM type, and compatibility you need to choose the RAM perfect for your motherboard to decide on how to use the maximum available RAM.
Once the motherboard is identified, you can take the help of tools such as CCleaner’s Speccy to get the core attributes.
Let’s say the RAM maxes out at 32 GB and you have 4 slots, then you can have each slot with 8 GB.
To check the compatibility of your existing RAM and processor, you can use Crucial System Scanner to give you all the details.
Once you download the application and run it, it scans your computer to provide all the vital information.
First, it shows the available slots and then suggests how much RAM to use to max out.
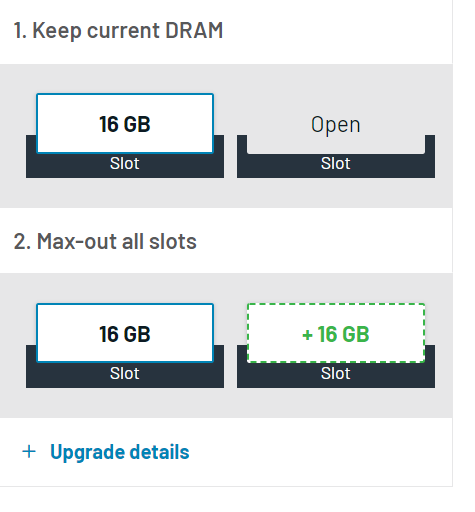
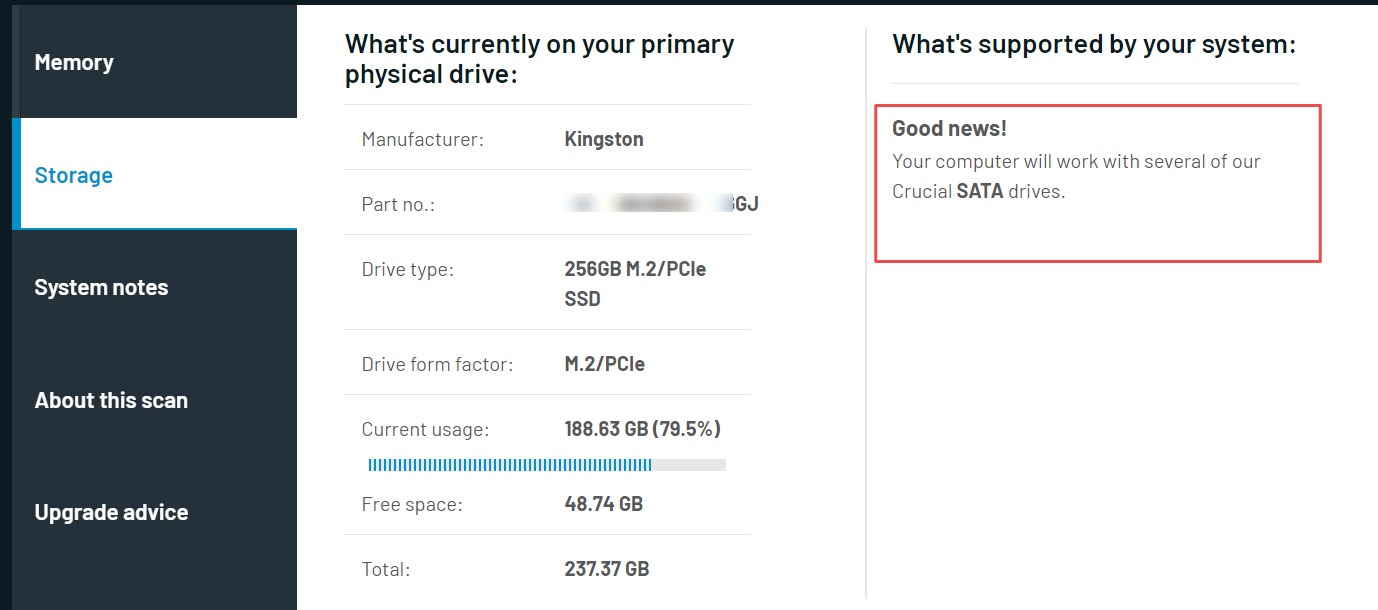
Next, under Storage, you get your physical drive’s details and confirmation if your computer is compatible with SATA drives.
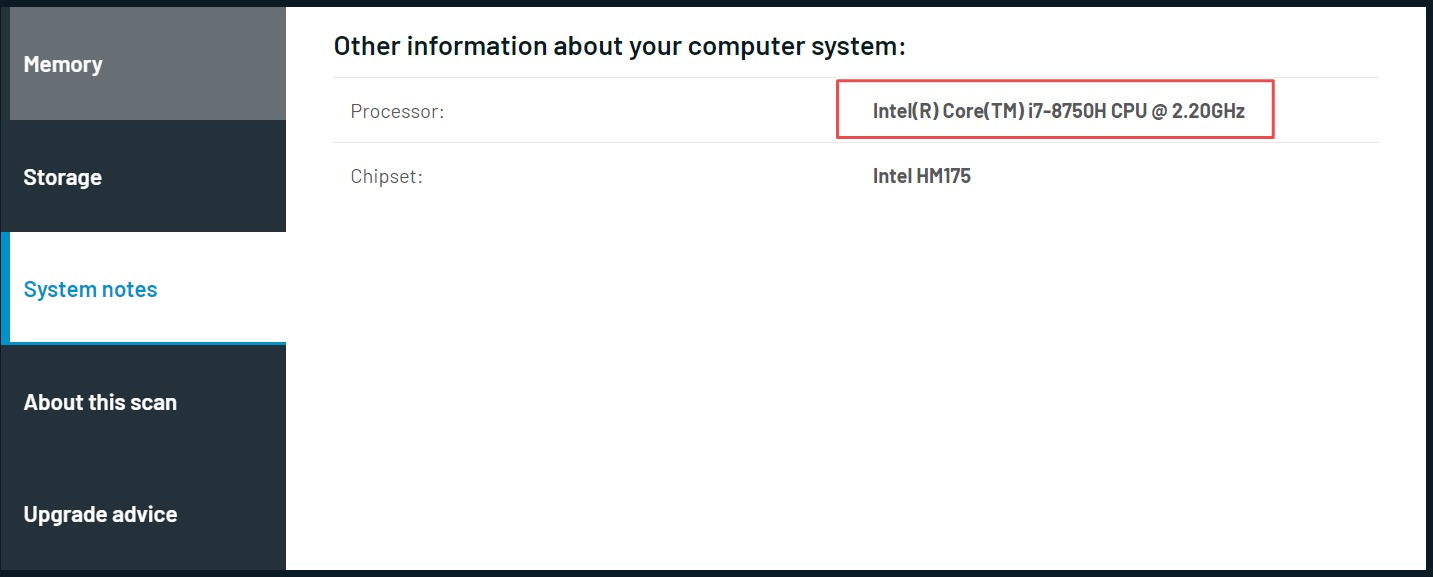
And then under System notes, you get the processor speed.
(of course, you can also get it from System Information)
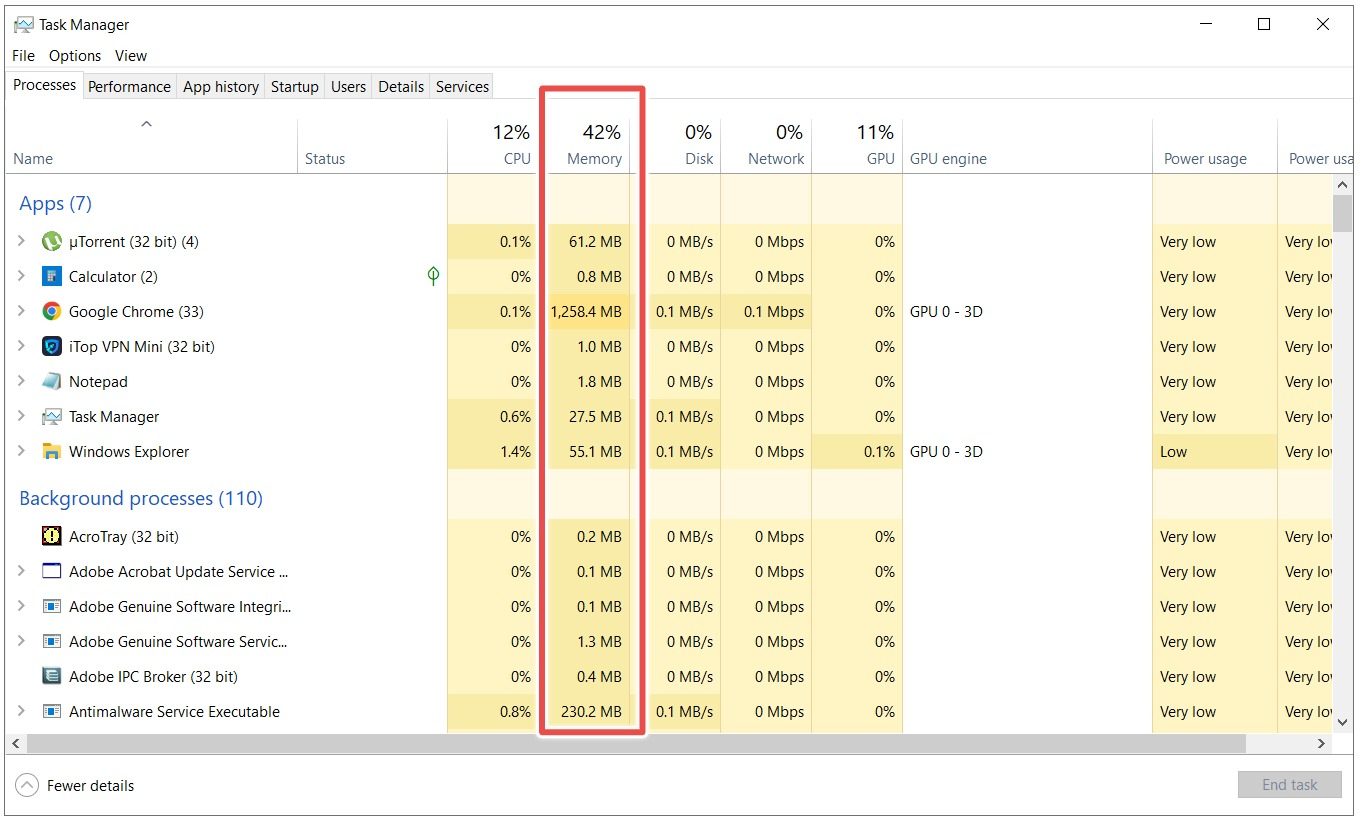
First, go to your Task Manager and check which processes are consuming the maximum memory space.
Once you check that, determine which process is consuming high RAM usage when idle and not being used currently. For instance, if Google Chrome was sitting idle, I would right-click on the process and End Task.
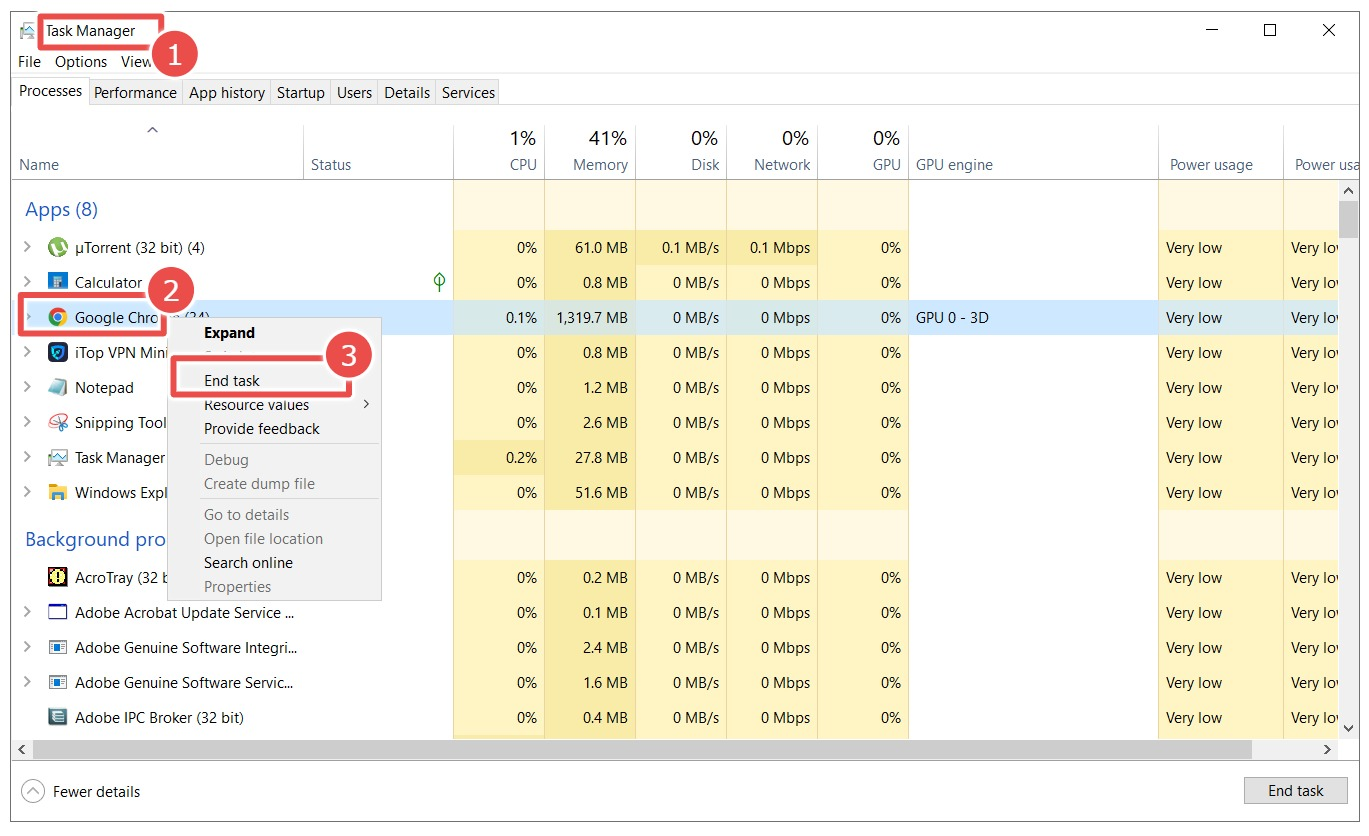
This action will help in freeing up your RAM usage.
Next, from the Taskbar Search box, type Background apps and click on it. Apps that receive information, and notifications can consume a lot of power. For example, why will I not turn off Candy Crush?

Some of the programs are designed to run in the background by default. So it is worth reviewing the list and turning off the ones that are not required.
This is all I had to share about how to check RAM and optimize it for better performance.
Were you able to check RAM on Windows? How did you free up memory? Let me know in the comments below now about your experience.
9 Quick And Easy Solutions To ERR_CONNECTION_RESET
Supercell’s Best Farming Game: Hay Day… and its Slowdown
Top 8 Easy Fixes For the Chrome Error ‘err_cache_miss’
We Have Analysed How To Fix Hulu Error Code P-DEV320 (In-Depth Analysis)
WD Black SN850 1TB: The Best PS5 SSD
Best DDR3 RAM for Gaming PCs in 2021
What Roblox Games to Play When Bored? Your Ultimate Fun Guide!
Using Soundbar With PC is Easy