Today I am excited to share 9 checks that you need to perform to ensure the correct Network Cable is properly plugged in Windows 10.
In this new guide you will learn :
Fixes required to be performed for a Network Cable not properly plugged in
Understand what to perform on your Ethernet Network Adapter
Test your Ethernet Cable
Which Type of Ethernet Cable to Buy
So infact, if you are searching for this solution, then this Guide is for you.
Chapter 1
Fixes For Network Cable Not Properly Plugged
Fixes for a Network Cable Is Not Properly Plugged in Windows 10
The Internet is a basic necessity for most of us, and it’s always alive and kicking. We all need faster internet speeds offering plans and options to stay connected. What if your Windows desktop or laptop suddenly stops connecting to the internet? Like you, many users get the ‘a network cable is not properly plugged in or may be broken’ error on Windows 10. It’s a baffling error to read when you know your computer is connected to the router.
Well..
You can first run the two basic checks before rolling your sleeves and start the real troubleshooting.
Is the WAN Port Unplugged?
The WAN (Wide Area Network) port on the router is where your Internet service provider’s cable is plugged for giving internet connectivity. If that cable is unplugged or has come out, then you should fix that first.
Is the Router Switched off?
The most common problem is when the router is switched off (by mistake), you won’t get any network connectivity.
Chapter 2
What To Perform On Your Ethernet Network Adapter
Does Your Windows Computer Have Wi-Fi and Ethernet Connections Active?
Most older desktops and laptops have an Ethernet port. Many also refer to it as LAN (Local Area Network) port or RJ45 port. Many modern motherboards also feature Wi-Fi built-in, and that could be advantageous at many levels.
That said, Windows gives priority to the wired Ethernet connection. That’s because the wired Ethernet connection is faster, reliable, and secure than the Wi-Fi connection. Only when Windows fails to detect a working Ethernet connection, it tries to utilize the Wi-Fi network.
Windows is programmed to use one mode of network connectivity – wired or wireless – to connect to the internet. That’s why you cannot use Wi-Fi and Ethernet at the same time. However, if your computer has only Ethernet, then you won’t see the Wi-Fi option.
In case your computer is not detecting the Ethernet cable or shows the network cable unplugged error, you should try re-enabling the Ethernet Network adapter. If you have Wi-Fi connectivity on your laptop or desktops, switching it off temporarily should help diagnose the Ethernet issue.
How to Re-Enable Ethernet Network Adapter and Switch off the Wi-Fi Network Connection?
In case your computer is not detecting the Ethernet cable or shows the network cable is unplugged, you should try the software fixes first.
You can follow these steps to reset the Ethernet network connection on your Windows PC.
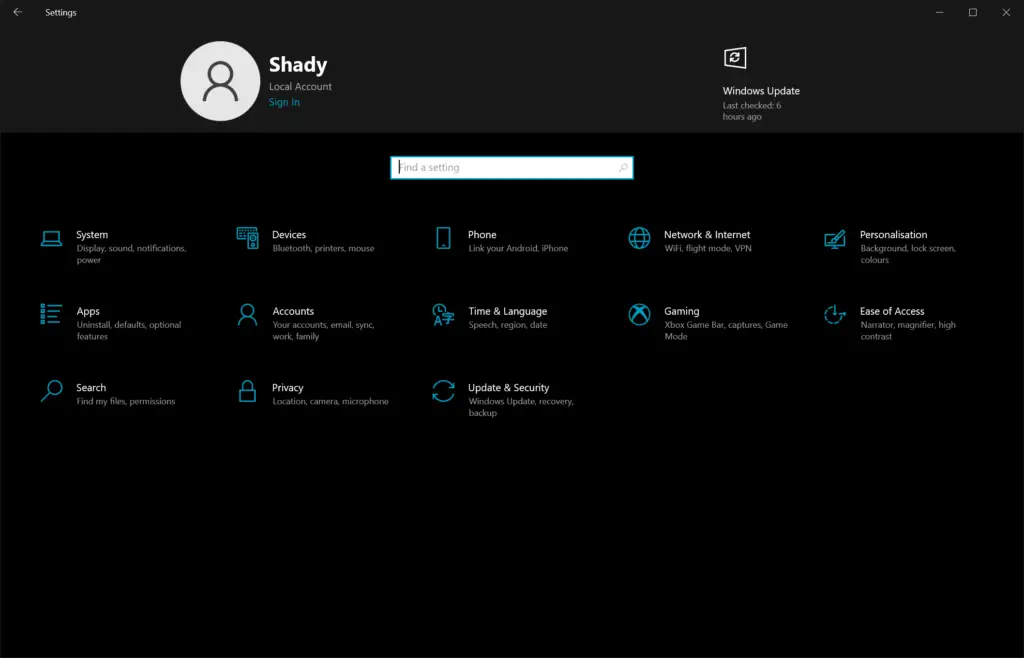
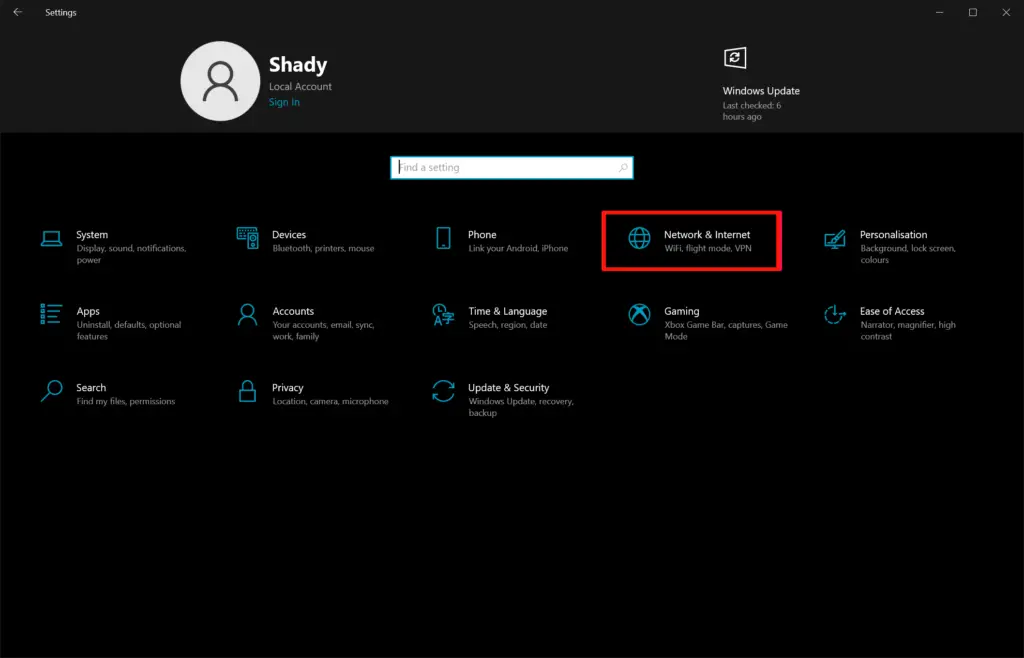
Step 1: Hit Windows Key + I keys to launch Settings.
Step 2: Select the Network & Internet. The Network Status shows whether your PC is connected to the internet via Wi-Fi or Ethernet.
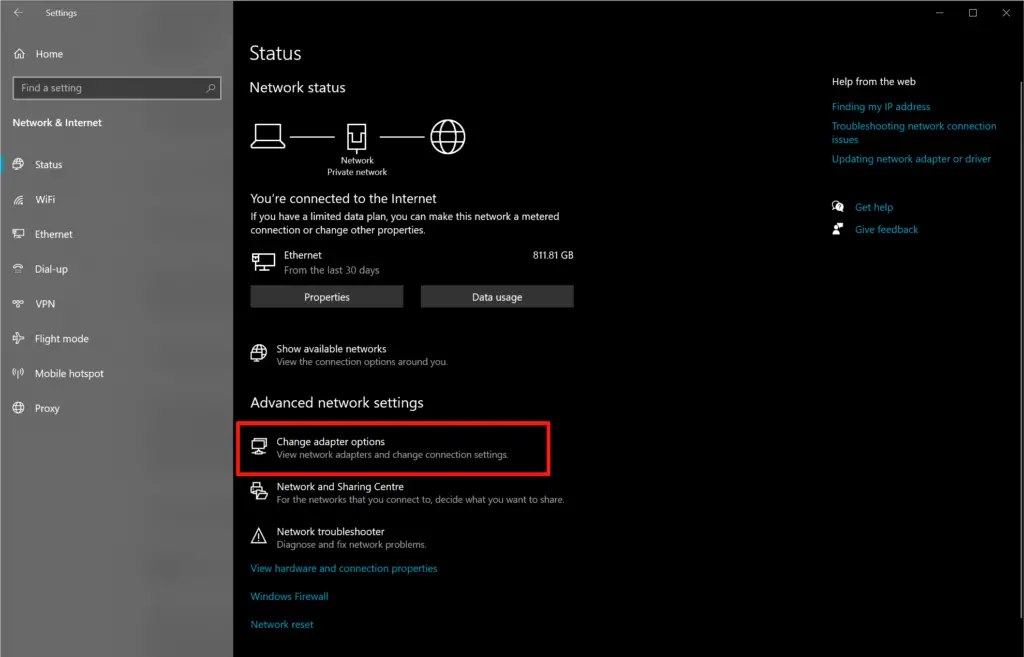
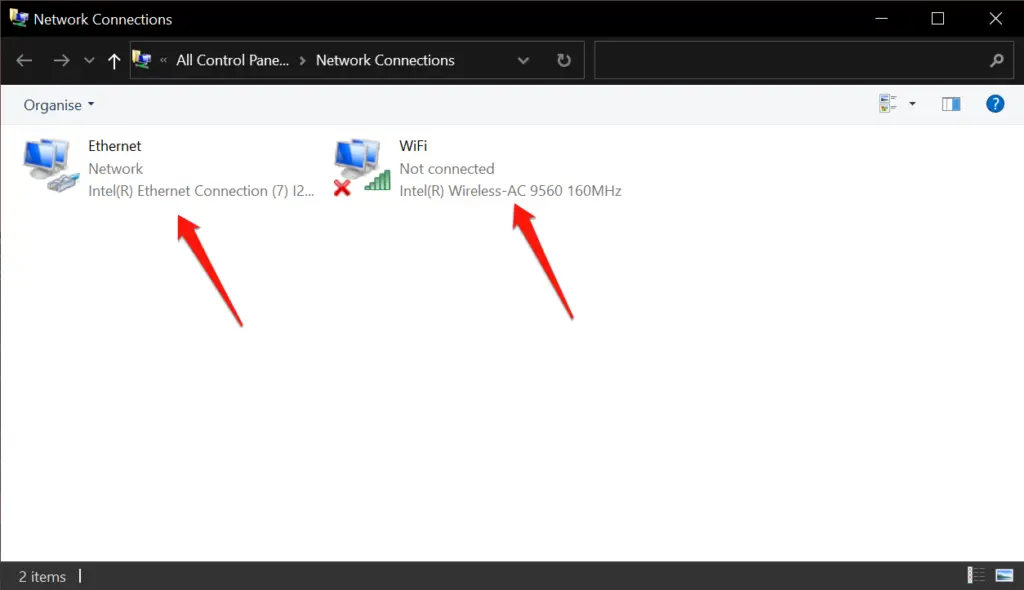
Step 3:Click Change Adapter Options to further investigate your PC’s network adapters. You’ll see the Ethernet and Wi-Fi connections listed under their respective network adapters in the following window.
Note: If your Windows PC doesn’t have Wi-Fi, skip to Step 5.
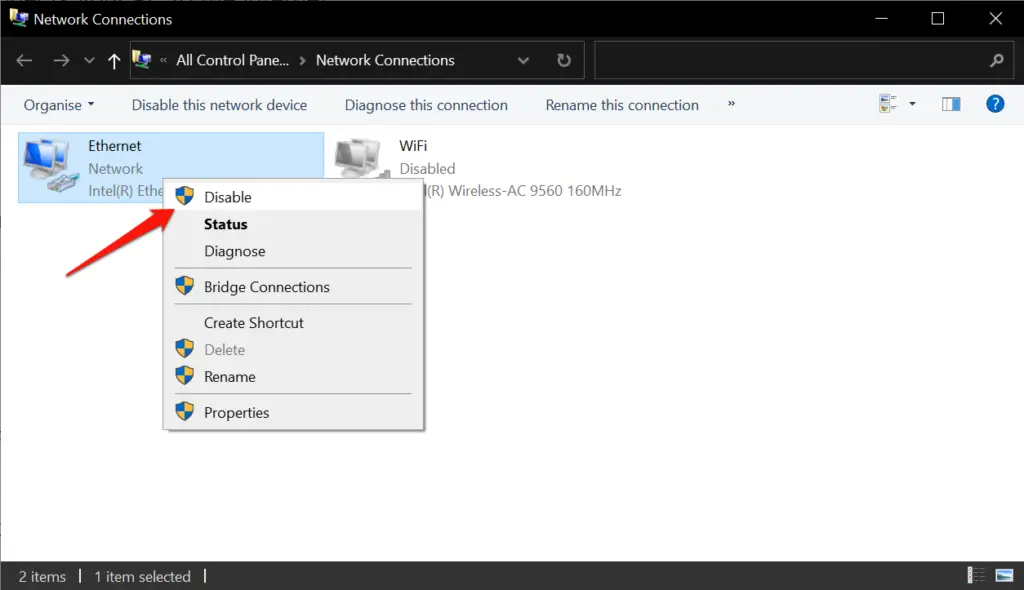
Step 4: To switch or change from Wi-Fi to Ethernet on Windows 10, you should first turn off the Wi-Fi network adapter. Right-click on the Wi-Fi network adapter and pick Disable from the menu that pops out.
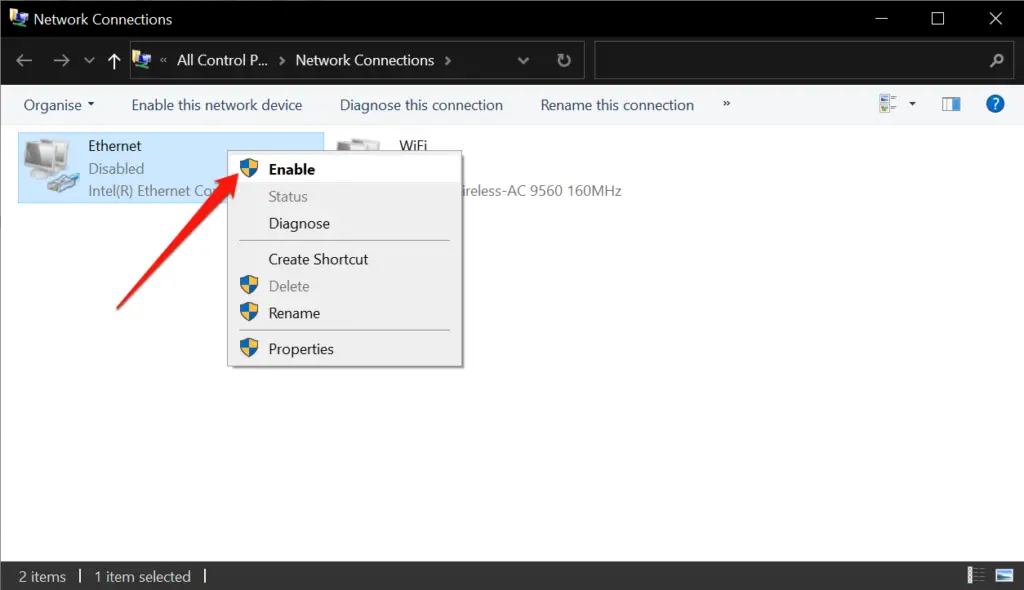
Step 5: Head to the Ethernet network adapter and right-click on it to select Disable.
After a few seconds, right-click on it again and select Enable to activate the Ethernet connection.
After that, your Windows PC should start using the Ethernet network connection properly. But if it still stops abruptly or you get an unidentified network error, then you can adjust the network adapter’s speed and duplex to check if that works.
How to Change Ethernet Network Adapter’s Speed and Duplex on Windows?
By default, the network adapters test the network connection quality and capabilities to negotiate and apply the best possible network settings. That’s how Windows determines to run your system at full-duplex for starters, which is like two-way traffic. The full-duplex mode means the simultaneous data transmission will happen two-way between two or more network devices at a time. Similarly, half-duplex means the data transmission takes place only in one direction at a time.
Your Windows PC would show the ‘A network cable is not properly plugged or may be broken’ error if the network adapter cannot automatically figure out the best network setting or something (malware or a rogue program) has hampered the network connectivity.
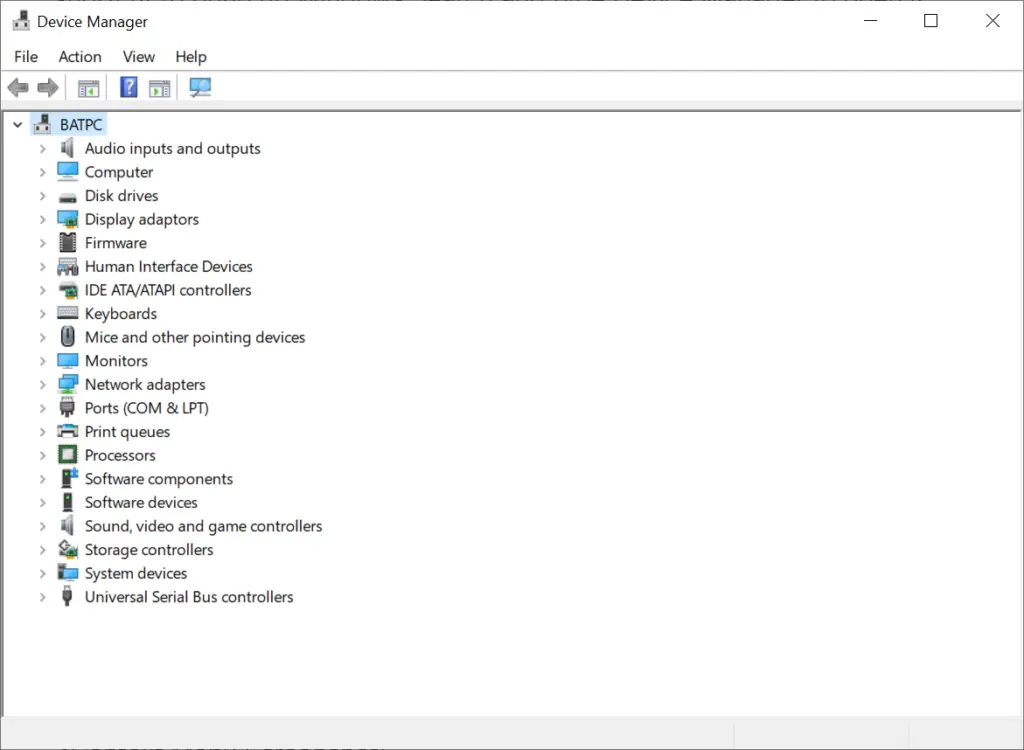
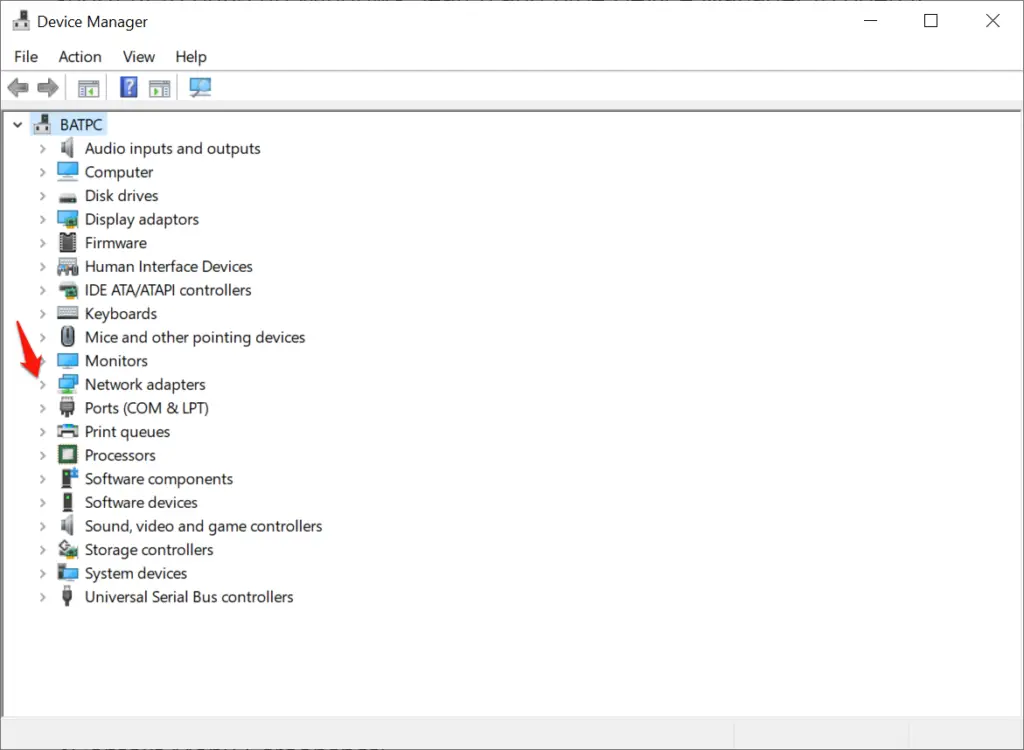
Step 1: Right-click on the Start button, and from the menu that pops out, select Device Manager.
Note: If you’ve set UAC (Universal Access Control) to maximum, you’ll have to permit Device Manager first to let it open.
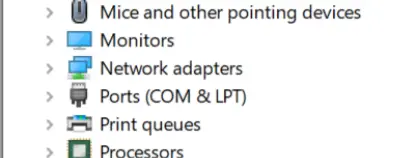
Step 2: Click on the > arrow in front of Network Adapters to reveal all the options.
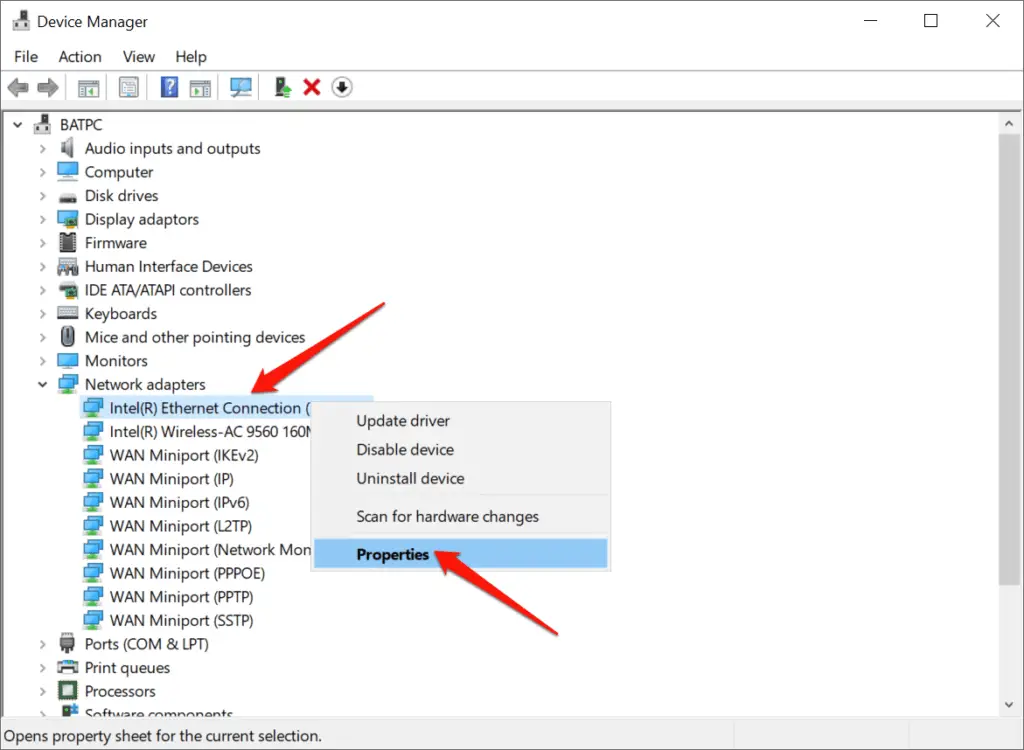
Step 3: Select the relevant Ethernet Adapter on your computer. Right-click on it and select Properties from the context menu.
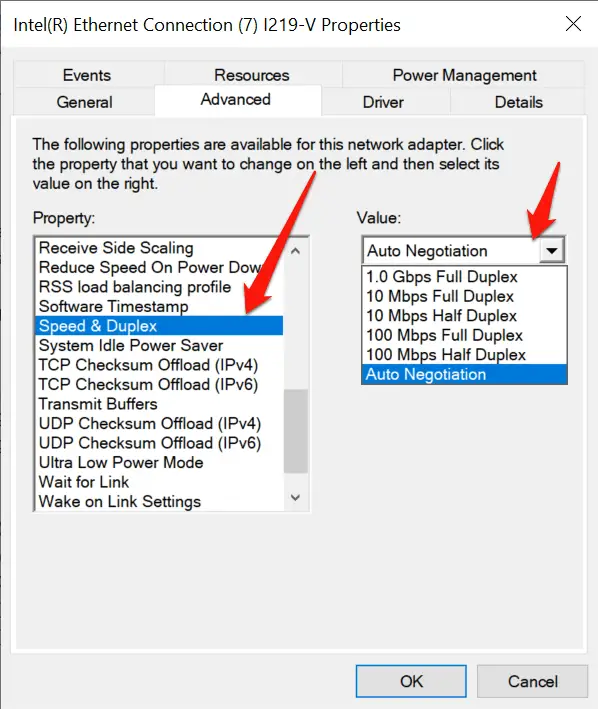
Step 4: Head to the Advanced tab. From the left-side box, select the Speed & Duplex option. That’ll show its Value set to Auto-negotiation by default.
Refer the screenshot in the next step.
Step 5:Click on the Value drop-down and pick either 100 Mbps Full Duplex or 1Gbps Full Duplex. Once done, click the OK button.
That should pick a relevant network connection value for your Ethernet connection. Hopefully, that would fix the connectivity woes like network cable not properly plugged on Windows 10 and the older versions such as Windows 8, Windows 7, and even Windows XP.
If you have installed any VPN apps, P2P software, or any other app that changes your network connection, then you’ll have to uninstall them completely. After that, resetting the Ethernet network adapter should fix the connectivity problems on your Windows PC.
How to Reset Ethernet Network Adapter Using Settings on Windows?
Windows provides a straightforward option to reset the network adapters without running a series of commands.
Step 1: Open the Settings.
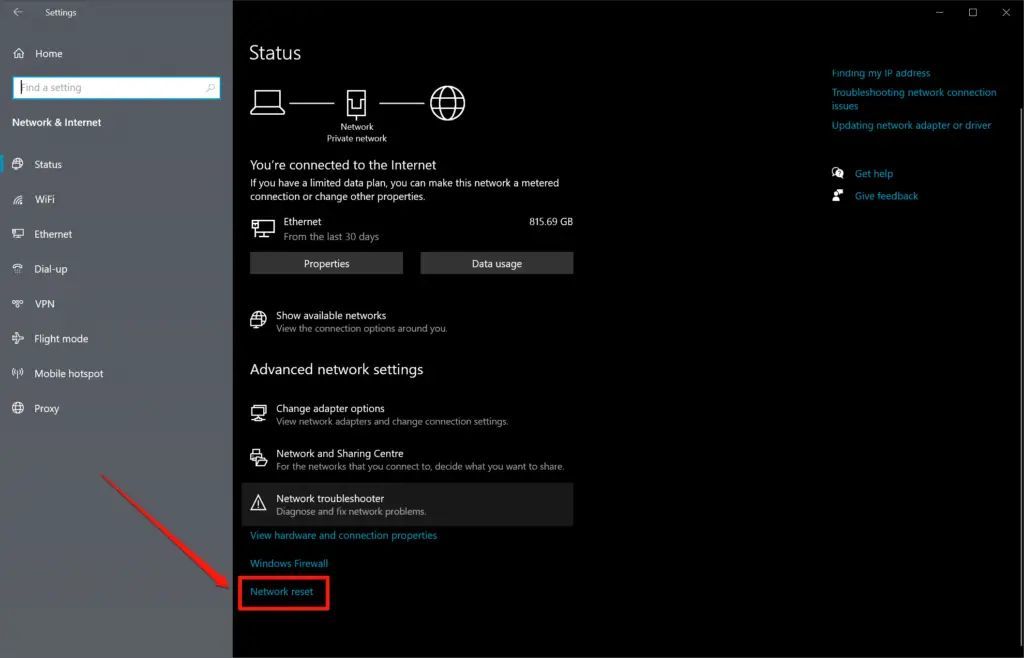
Step 2: Click on Network & Internet. By default, the Network Status shows up.
Step 3:Under the Advance Network Settings options, you’ll see the Network Reset option.
Click on it and then select Yes to confirm.
After that, let Windows reset the Ethernet network adapter. Once it reboots, you should be able to connect to the internet over the Ethernet connection. If that fails, you might have to reset the network stack.
How to Update Or Reinstall Ethernet Network Drivers Using Device Manager on Windows?
An older Ethernet network driver can also cause compatibility issues with the latest Windows update. So you’ll need to update or reinstall the latest version of the Ethernet drivers on your Windows PC.
If your PC’s Ethernet isn’t working and you can’t connect to the internet, then you’ll have to download it on your phone or a friend’s PC. Then you can transfer it to your computer over USB.
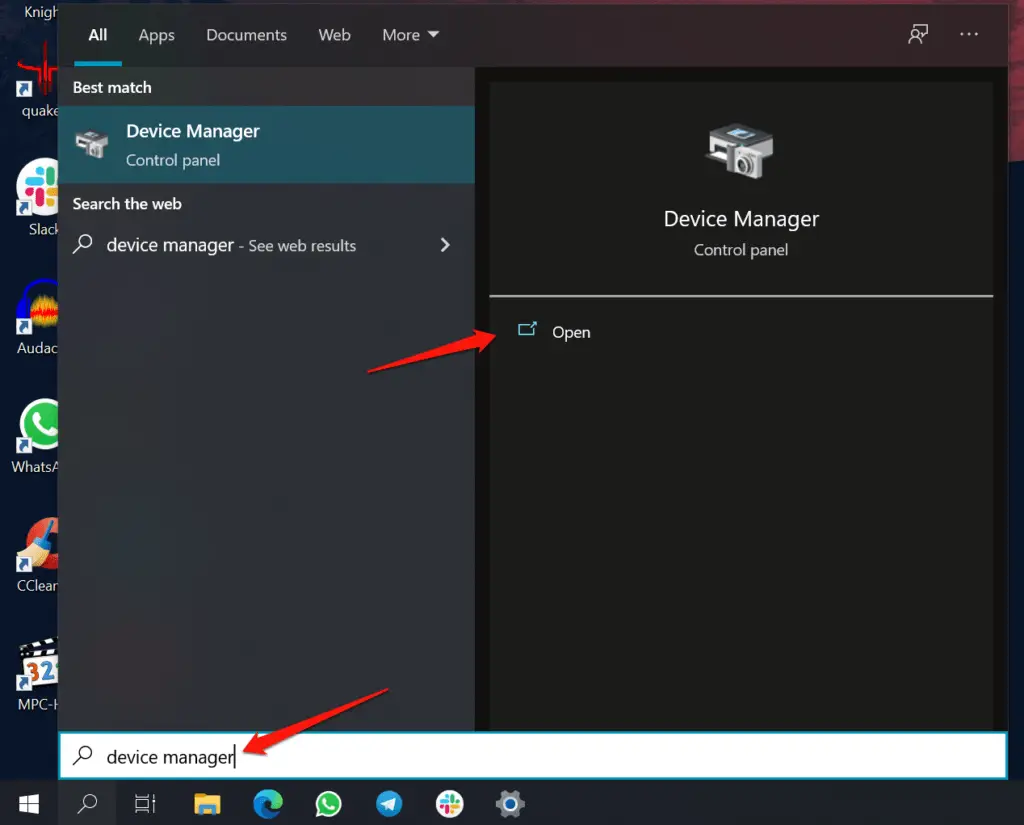
Step 1: Right-click on the Start button and select Device Manager from the menu that pops up. Alternatively, you can hit the Windows Key+S shortcut to bring up Windows Search and type Device Manager to open it.
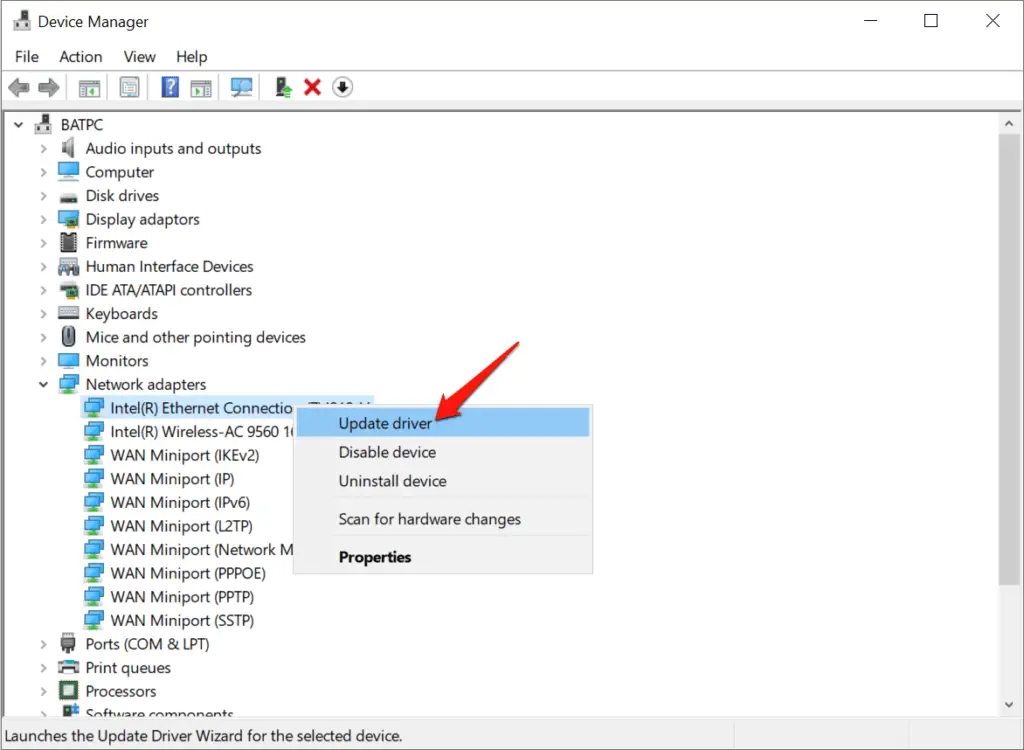
Step 2: Expand Network Adapters by clicking on the > arrow to reveal the options.
Step 3: The first one on the list should be your Ethernet connection adapter. Right-click on it.
Refer the screenshot in next step.
Step 4: Select Update, and another window will pop out.
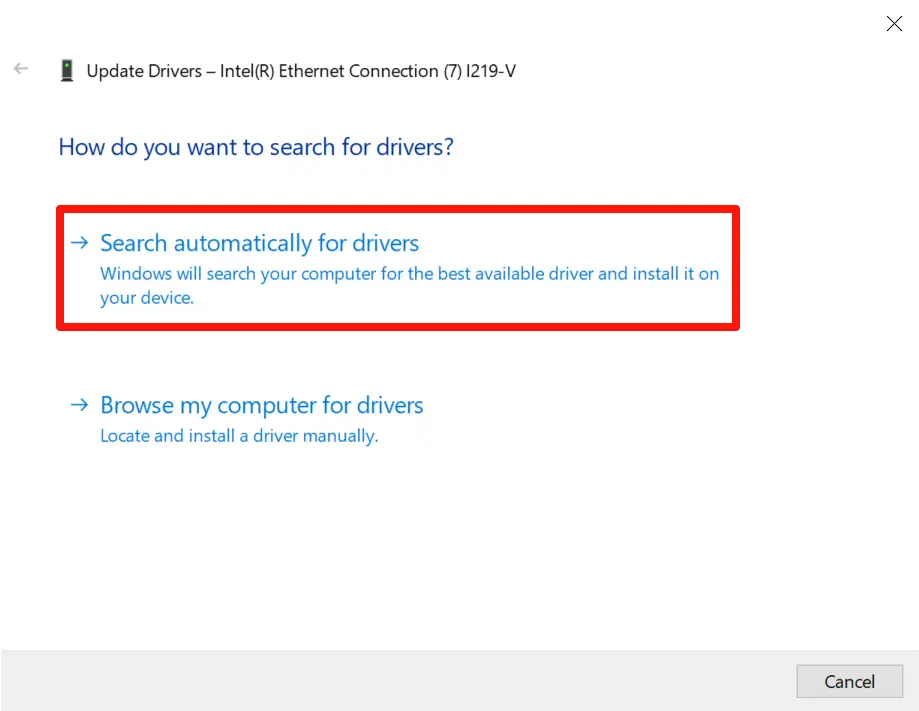
Step 5: From the Update Drivers window, you can let Windows Update search for drivers and install automatically.
If your PC isn’t connected to the internet, pick Browse my computer for Drivers to navigate to the location where you’ve copied the latest drivers for your computer’s Ethernet.
After you update or install new drivers, you should restart your PC. Then Windows should detect the Ethernet cable and set the Ethernet connection properly. You can open a website in a browser to confirm that it works.
This solution should essentially fix all possible woes that would show network cable as unplugged. However, if you still experience connectivity outages, run the Windows Network Diagnostics. For that, hit Windows Key + S shortcut to launch Windows Search, and type fix network adapter in the search box.
Does it still show the network cable is unplugged, or the network cable is not detected error? Then, it’s time to inspect the Ethernet cable physically.
Chapter 3
Test the Ethernet Cable
How to Test Whether the Ethernet Cable Is Working or Not?
Firstly, you should look out for any unnecessary sharp bends or twists on the Ethernet cable. If that’s clear, pull out the Ethernet cable from your computer’s LAN or Ethernet port. Clean the Ethernet cable’s port with a microfiber cloth. Use a q-tip or earbud dipped lightly in the IsoPropyl alcohol to clean the Ethernet port of your PC and let it air dry for a minute or two.
Now replug the Ethernet cable in your Windows PC’s ethernet port again till you hear a click sound. That sound confirms that you’ve properly plugged the Ethernet cable in the port.
Alternatively, you can clean the Ethernet ports of your router and try using different ports on it to check which one works. If needed, you can restart your Windows 10 PC to let the system automatically detect the Ethernet cable.
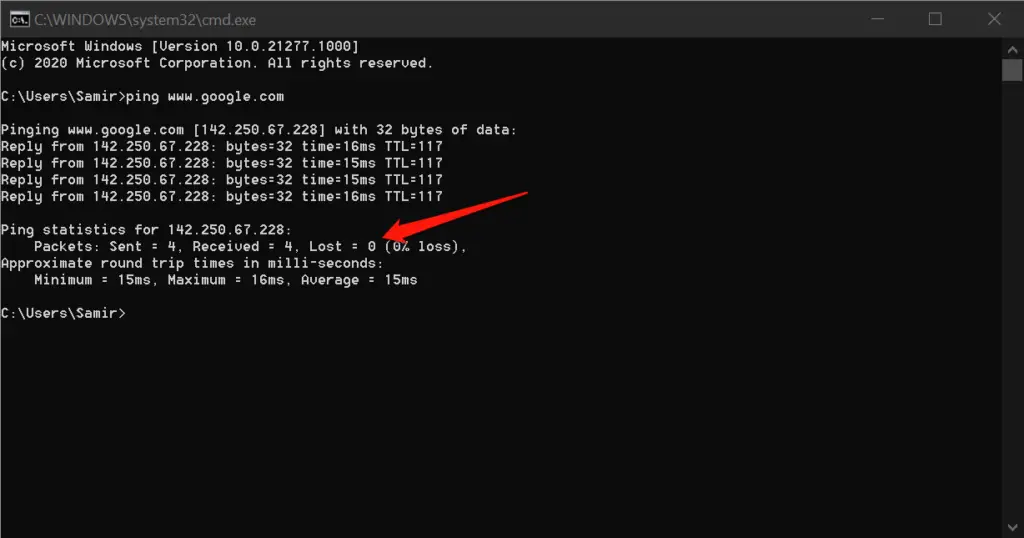
After that, you can open any web page in the browser and check if it loads properly. Also, you can use the Command Prompt to test your connectivity. Hit Windows Key+S to launch Windows Search, type cmd or Command Prompt, and open it.
In that window, type ping www.google.com and press the Return/Enter key. That command will enable your computer to ping Google’s server and check if there’s a response. You can do this to check if your internet connection is working properly.
If Windows 10 still shows the same network cable is not properly plugged in error, it’s quite possible that the Ethernet cable is faulty or has gone bad.
Chapter 4
Type of Ethernet Cable to Buy
Which Type of Ethernet Cable Should You Buy
Of course, everyone wants to know which best Ethernet cable should work for them, and the answer is quite simple. You should know that the long Ethernet cables do not reduce speeds as they are designed and certified to carry data over longer runs (length).
You can use a Cat 5e Ethernet cable for your home or office to get the best possible speeds at a budget cost. A single certified Cat 5e Ethernet cable of up to 100 meters can deliver 1Gbps network speeds. That means the Ethernet cable, short or long, should deliver consistent speeds.
The Cat 6A Ethernet cables are the fastest certified Ethernet cables that deliver 10Gbps speeds at a 100 meters long run. You can consider them for a fresh setup or futureproof upgrade. These new cables can support the 802.11ax standard routers and access points. You might have to add them to your network in the future.
The Cat 6A Ethernet cable also supports Power over Ethernet, which allows them to carry power (up to 100W) for the network switches, security cameras, or other compatible devices running. In short, you won’t have to worry about providing AC power to them separately.
A simple blue or grey colored Cat 6A cable with several trustworthy reviews. Your priority should be performance and reliability over style. Avoid something that looks expensive, flashy, and too good to be true.
No More Network Cable Unplugged or Network Cable Not Detected Woes
The troubleshooting ‘network cable is not properly plugged in,’ or network cable not detected problem should be possible with the solutions mentioned above. Though you’ll end up spending some time tinkering around, it’d be worth it. You’ll get to know how to plug the Ethernet cable in the RJ45 port of your desktop or laptop, clean the Ethernet cable, reset/reinstall Ethernet network adapters, and more.
Nice.
So the next time your PC shows that very error, you’ll know the troubleshooting routine and fix it in a minute or two.
Now It’s Your Turn to Check
Which step from this guide are you going to try first?
Do you plan to get the recommended cable for yourself?
Or maybe you want to test out some of the strategies Or you know of another method that is not mentioned here.
Either way please leave a comment below as I would love to know from you.


Master the Art of Gaming: A Beginner’s Guide to Gamers
Unraveling the Magic of Artificial Intelligence: A Human Perspective
Top 8 Easy Fixes For the Chrome Error ‘err_cache_miss’
Best Bluetooth Headphones for PS4: The Ultimate 2022 Guide
9 Easy Ways to Fix Windows Can’t Communicate With the Device or Resource
Xbox Companion App – All You Need to Know
How to Change Gamemode in Minecraft: The Definitive Guide
4 Easy Ways to Hide Apps on Android Without Rooting or Disabling